Page 3
Building a Ukulele |
||
|
Page 3 |
| Click on pictures to see larger images | ||
|
|
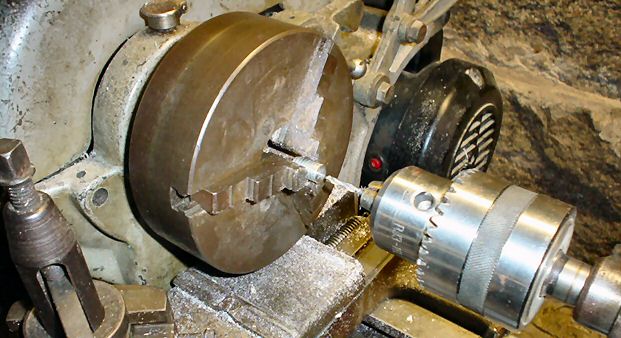
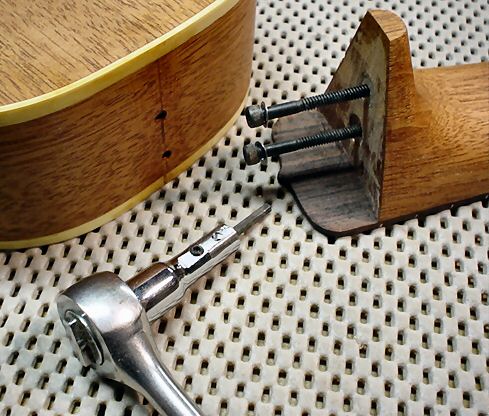
I choose a butt joint for mounting the neck Two 6-32 socket head screws are used as fasteners. In this photo I am drilling out short pieces of 3/8" threaded rod (actually pieces cut from 3/8" bolts) to use as threaded inserts in the neck. After drilling the inserts the holes were threaded with a hand tap to receive the screws. | |
|
|
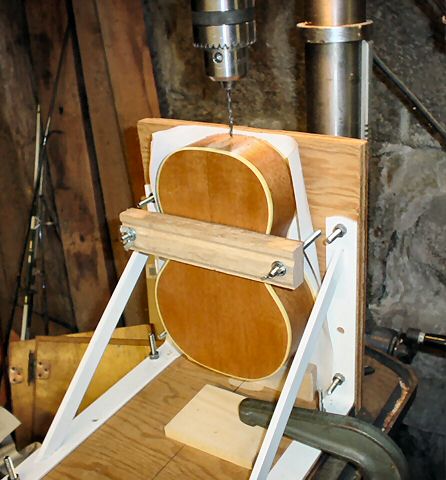
This jig was made with strong but inexpensive shelf brackets. A little shimming was required to get the vertical board perfectly square with the base. The photo shows the drilling of the holes for the neck attachment screws. The jig keeps the drill parallel to the top of the body. This jig was also used to drill the 3/8" holes in the heel of the neck for the threaded inserts. | |
|
|
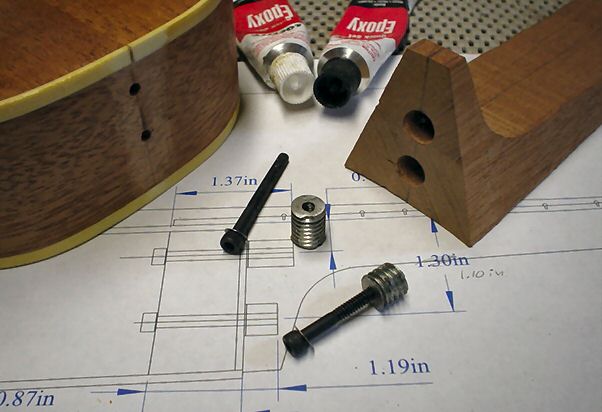
These are the components of the neck attachment system. Instead of trying to thread inserts into the heel of the neck I used epoxy to glue them in. The insert that mounts in the heel of the neck furthest away from the fingerboard had to be made quite a bit shorter due to the shape of the heel. | |
|
|
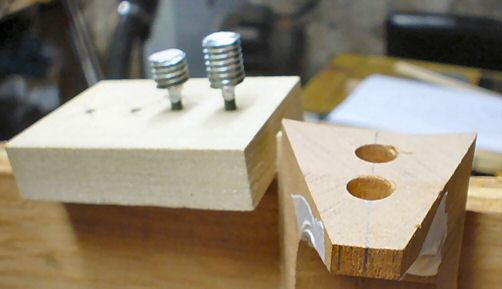
I mounted the inserts on this wood block using screws to keep everything in alignment when gluing them in. To keep the epoxy out of the threaded holes in the inserts, I placed small disks of masking tape on the ends, and sealed the screws where they screw into the inserts with Teflon pipe sealing tape. | |
|
|
Here everything is ready to assemble. The small 1/4" drive ratchet fits easily through the sound hole. The special hex wrench was made by shortening a 1/4" drive extension and drilling a hole in it to hold a piece of hex key. The piece of hex key is cleverly retained by a set screw in one hole, and the broken off tip of a 6-32 tap in another hole. The washers on the screws are little bellville spring washers. | |
|
|
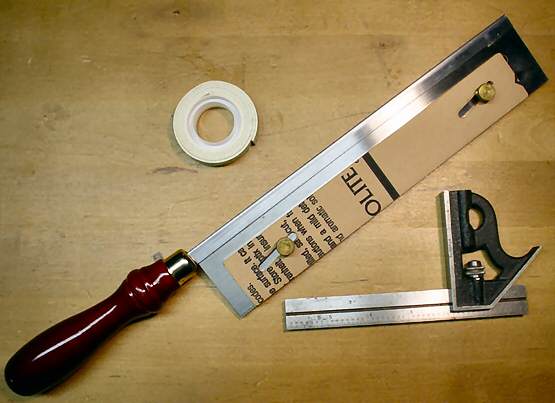
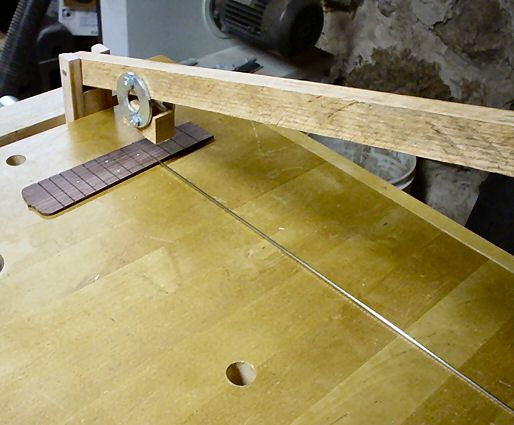
On to the fingerboard: I was going to make a jig to accurately saw the fret slots but just couldn't get started fast enough. So I mounted the fingerboard blank on a thicker piece of wood using double sided mounting tape. The mounting board was clamped to the workbench. The fret positions were found with a machinists rule and marked with a knife. The slot cutting proceeded as follows: 1. Position Stew-Mac fret saw on fret position mark. 2. Use small machinists square along side saw to keep it square with board. 3. Carefully start saw cut. 4. Remove square and finish cut until depth guide hits fret board. 5. Repeat 11 more times. | |
|
|
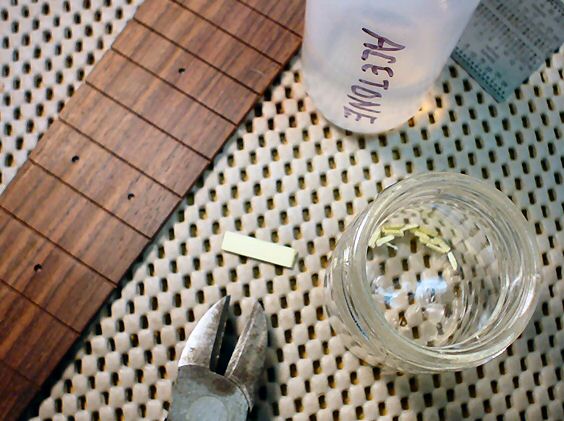
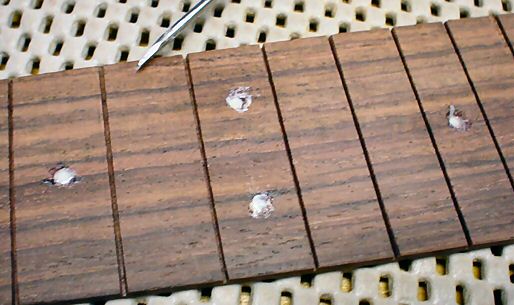
For fingerboard position markers I drilled shallow 5/64" holes where needed. I snipped some pieces of the ivoroid binding and placed them in a small jar with some acetone. | |
|
|
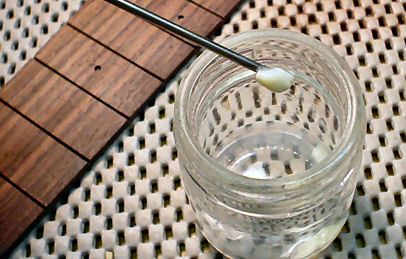
I used an old stainless steel bicycle spoke with the end flattened out as a mixing rod / spatula for the melted plastic binding. | |
|
|
I just packed the holes with the melted plastic. It looks messy here but scraped clean. It took two applications to fill the holes level due to shrinkage. | |
|
|
Fret wire was Stew-Mac standard mandolin fret wire (#0764). I made a simple fret press based on the one Dwain Wilder shows on his web site (Bear Meadow Appalachian Dulcimers). | |
|
|
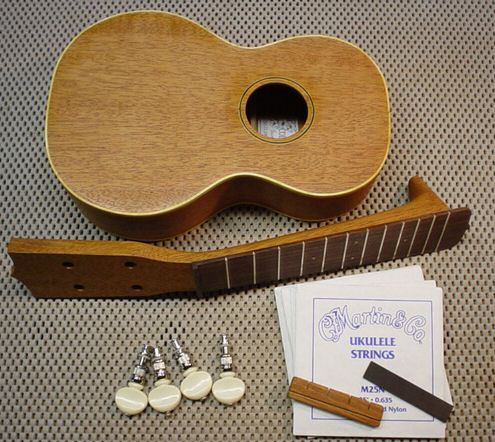
Getting close to final assembly! All that remains is to apply the shellac finish, mount the neck and bridge, and do the final setup. | |
| Go to Page 2 |
Page 3 |
|