
Page 2
Building a Ukulele |
||
|
Page 2 |
| Click on pictures to see larger images | ||
|
|
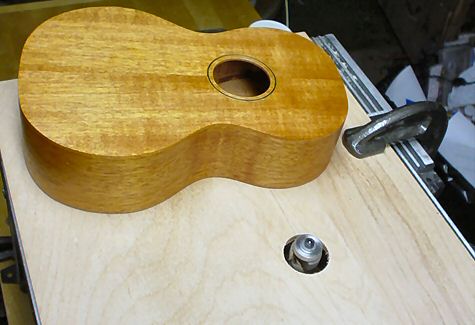
Now to cut the binding channels. Here's the patient on the table prior to the operation. The body has a wash coat of shellac applied to help protect the surface. | |
|
|
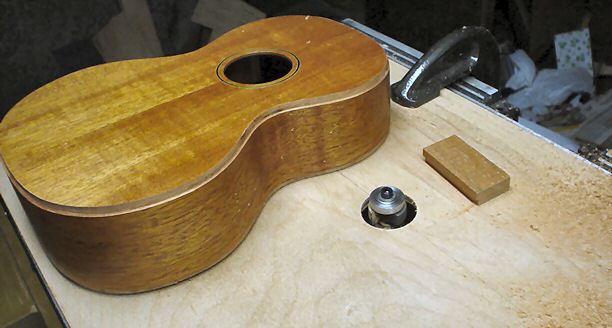
This is the Stew-Mac binding cutter in my router table. I found that when first bringing the body into contact with the bit, the spinning bearing would make a mark on the side. Once the outer bearing race stopped spinning against the body it was fine. To stop the marking, I pressed the scrap of wood shown in the background against the bearing to stop the spinning bearing before pushing the body against it. | |
|
|
The finished binding channels were nearly perfect! | |
|
|
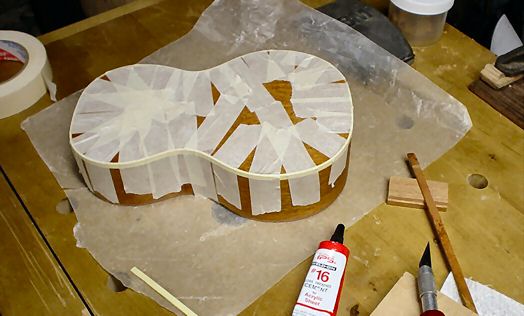
I used Weld-On cement with the ivoroid plastic binding (both from Stew-Mac). I used plain old masking tape to hold the binding in place until set. | |
|
|
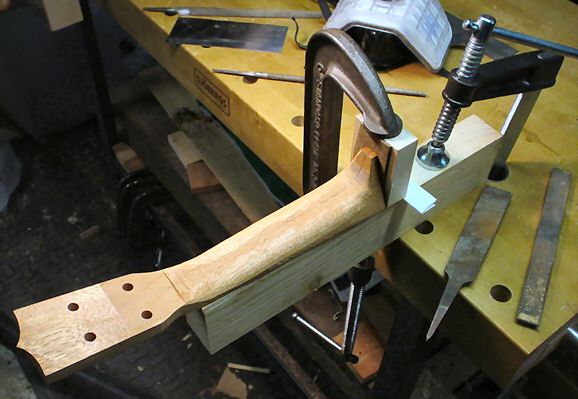
The neck was cut from a single piece of mahogany 12" long. First a scarf cut was made at the headstock angle and the cut off piece glued back on as shown. I made this cut on my band saw by clamping the neck blank at the proper angle on a sled that rides in the miter slot of the saw table. The thick section at the end of the headstock was sawn off and glued to the other end for the heel. | |
|
|
The side profile was cut out on the band saw. From the waste, a thin piece was cut out to use for the face of the headstock. | |
|
|
Difficult to see in the photo, but the sides of the neck have been ripped on the band saw. These cuts were made at an angle to bring the heel roughly to shape. Also the piece for the headstock face has been glued on. After this photo was taken the headstock face was scraped down so that is very thin; effectively making it a veneer. Then the headstock was brought to near final thickness on the band saw by sawing the back away. | |
|
|
Final shaping of the neck was done mostly with fine rasps and files, and finished by sanding. | |
| Go to Page 1 |
Page 2 |
|