Click on pictures to see larger images
|
|
||
|
|
||
|
Click on pictures to see larger images |
Ukulele #3 - Building It |
|
|
|
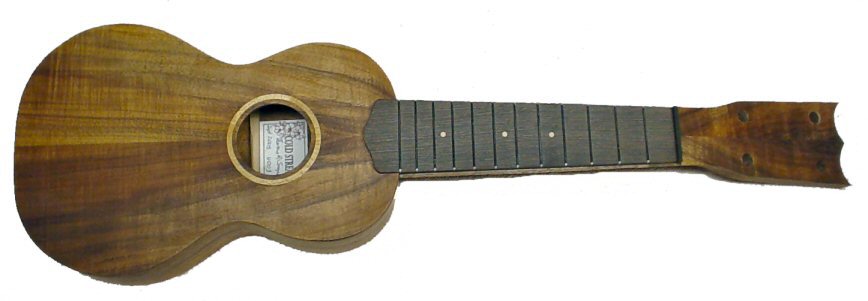
Ukulele #3 will also be a soprano and will be built with koa body and neck. I'm not planning to have any binding on this one. The fingerboard will be wenge. I'm going to add a CF reinforcement to the neck since I've read that koa can be a little more unstable than mahogany. | |
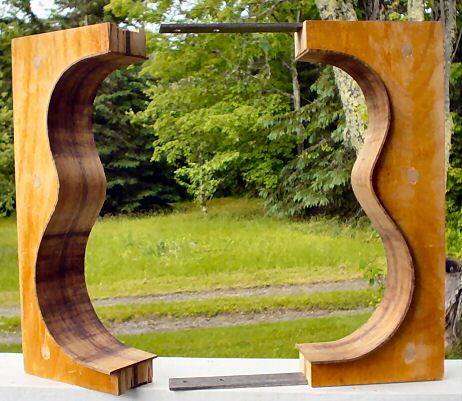 |
Koa sides in mold halves. The koa bent very nicely for me and fit the mold shape well. | |
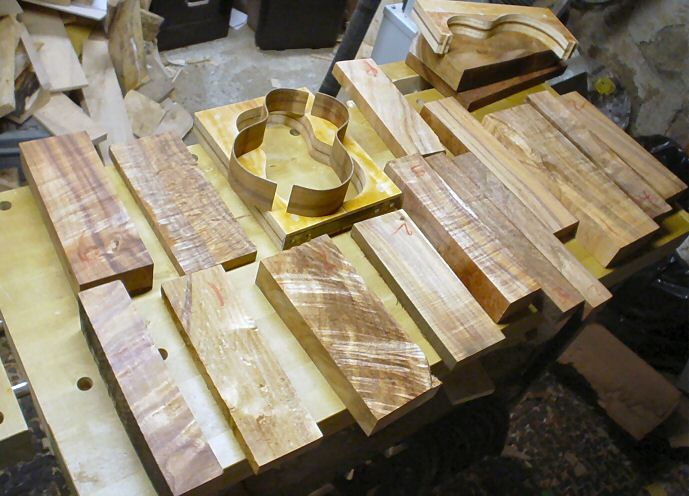 |
Choosing a piece a koa for the top and back. For this one I picked a less figured piece but with nice color variation. Note the concert size uke mold on the back corner of the bench; things to come! | |
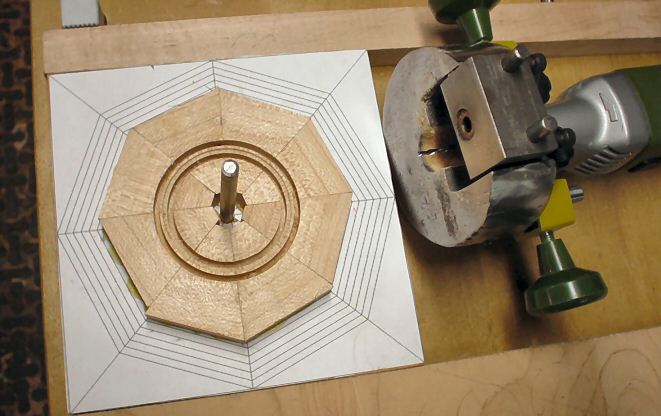 |
I glued up wedges of quartersawn sugar maple for the sound hole trim ring. I made cuts with my Proxxon rotary tool to define the inside and outside diameters of the ring. | |
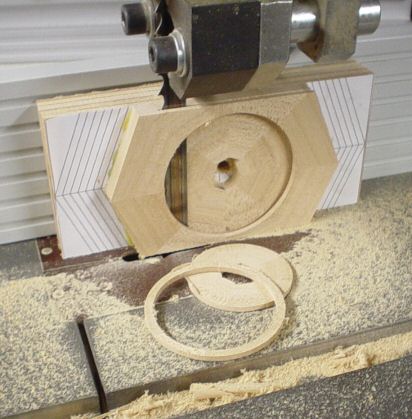 |
Separating the maple sound hole trim ring on the bandsaw. | |
 |
My idea was to have the rays of the quartersawn maple oriented radially around the hole. | |
 |
I attempted to bend some koa strips on the hot pipe to use for linings, but they were a little thick. They had some grain runout and were breaking at the waist bend. Next I made some very thin strips of sugar maple. They bent easily by hand and I glued them in cold. To get a little more gluing area I followed up by adding similar thin strips of cherry on top of the maple. | |
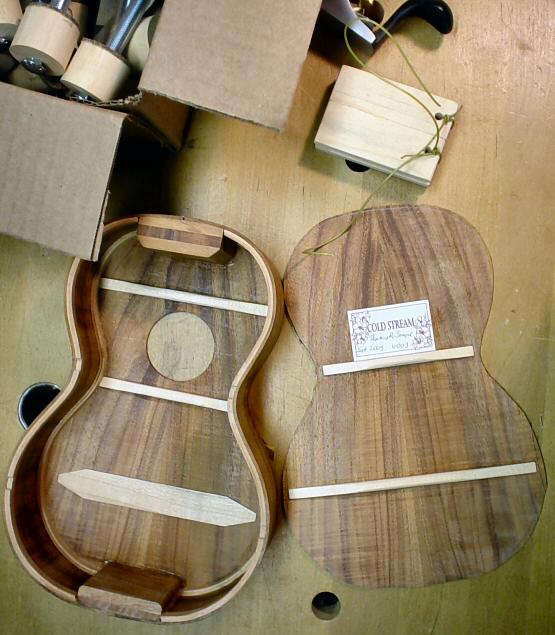 |
Getting ready to close up the body. Not much different here from previous build, except for solid linings. Braces are spruce. Bridge patch is sugar maple, very thin. Heel and tail blocks are laminated koa. | |
|
|
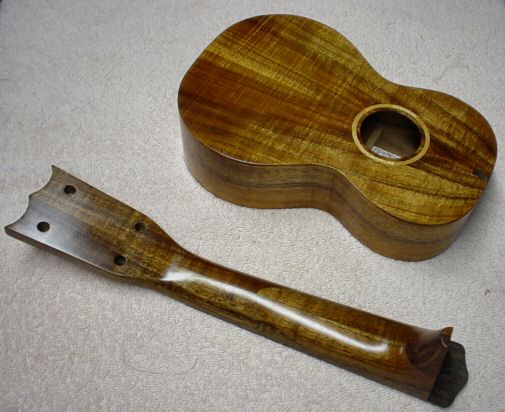
Unshaped neck mocked up against body. Body has first coat of shellac, before filling. Starting to get an idea how the finished instrument will look. Wenge fingerboard has maple dots for fret board markers. | |
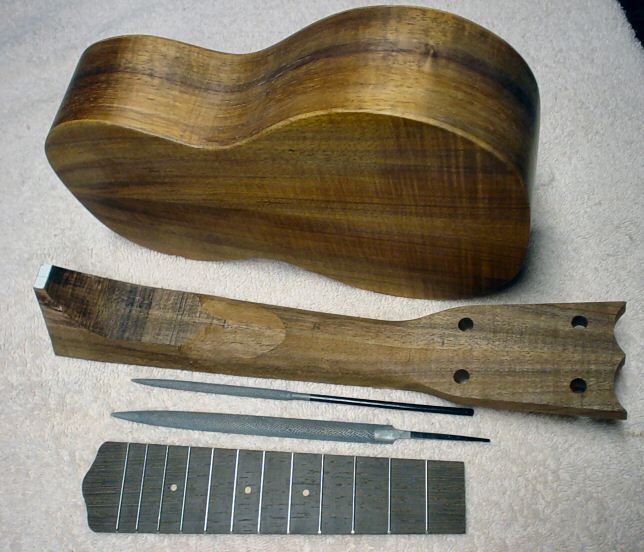 |
Partially shaped neck. Rough shape was sawn out on band saw. Shaping so far was completed with two mini-rasps shown. Note the unusual position of the neck scarf joint; midway down the neck shaft instead of in the head stock. This is sort of an experiment (okay, it was a mistake and I decided to go with it). | |
 |
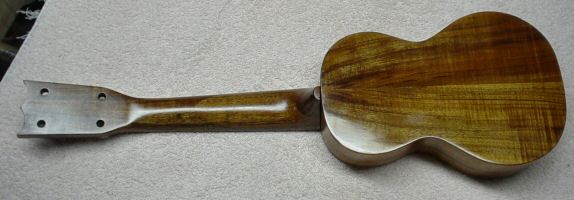 |
This shows the neck and body with the finishing process partially complete. The finish is orange shellac applied with French polishing methods. |
 |
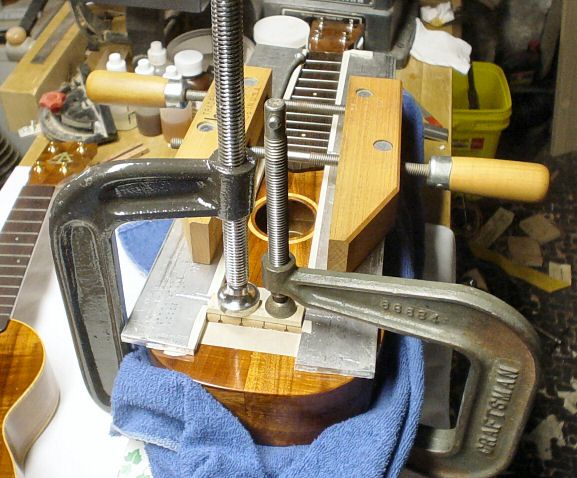 |
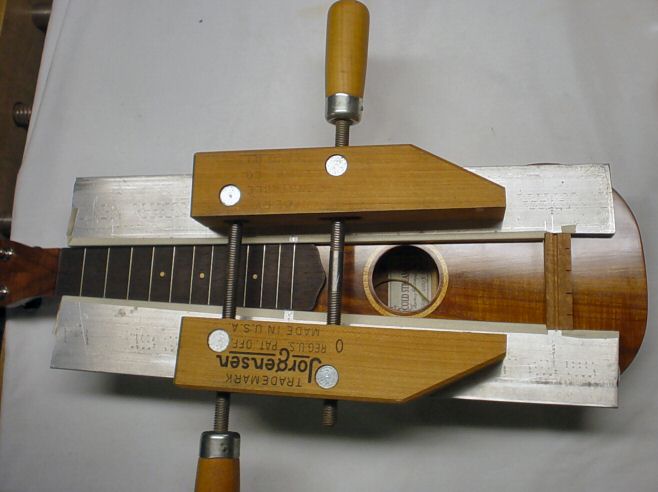
I came up with this jig to locate the bridge. The aluminum bars are screwed to the bottom of the clamp. The bars are scribed with marks at the 12th fret and saddle locations. The bars both center the bridge to the fingerboard, and hold it in place while gluing it on. |